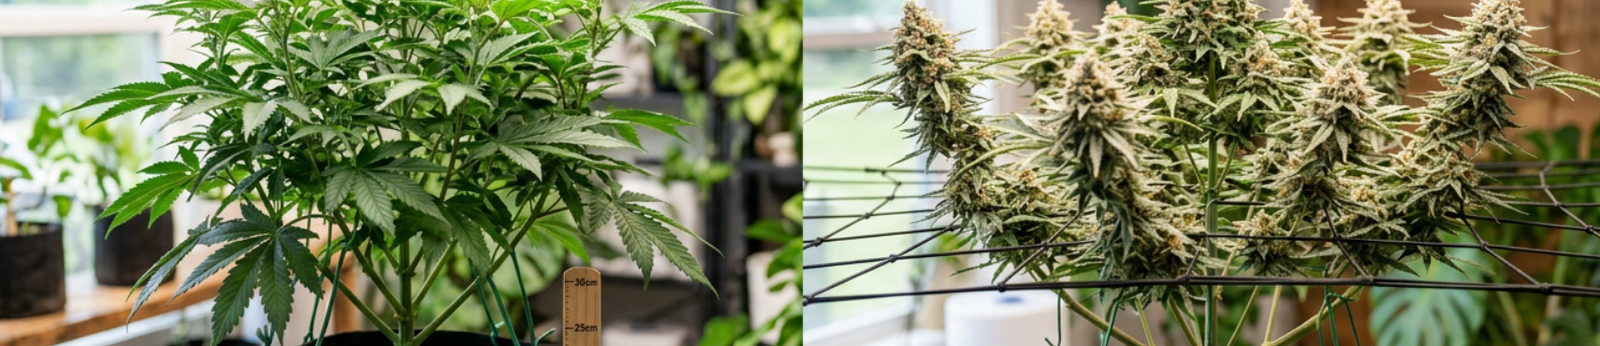
Hang your LED grow light at the right height and your plants stay compact, green, and heavy with buds. Get it wrong, and you’ll see stretched stems, bleached leaves, or stalled growth.
The distance between your light and canopy is one of the easiest adjustments in hydroponic lighting, and one of the most powerful. Here’s how to set it right for every growth stage: seedling, vegetative, and flowering. No burned tips. No leggy stems.
Quick Takeaways: LED Grow Light Height at a Glance
| Growth Stage | Height Above Canopy | Key Goal |
|---|---|---|
| Seedling | 24-36 inches (60-90 cm) | Gentle light to avoid stress |
| Vegetative | 18-24 inches (45-60 cm) | Encourage bushy, compact growth |
| Flowering | 12-18 inches (30-45 cm) | Maximize light intensity for buds |
| High-intensity LEDs (e.g., bar-style) | 6-12 inches (15-30 cm) with good ventilation | Very close canopy placement if heat allows |
Always start at the higher end of the range and lower gradually over several days. Watch your plants; they’ll tell you if the height is right.
Why LED Grow Light Height Matters So Much
Unlike older HID lights that pump out intense heat, LED grow lights run cooler. You can place them closer to the canopy without burning leaves. But closer isn’t always better.
Hang an LED too low, and you risk light bleaching: the top leaves turn white or yellow and stop photosynthesizing. Too high, and your plants stretch toward the light, becoming tall, weak, and less productive.
This is especially critical in hydroponic lighting setups where plants rely entirely on artificial light. Without the sun’s natural intensity gradient, you must manually control the distance to deliver the right PPFD (photosynthetic photon flux density) at each stage. Using lights for hydroponics well means balancing intensity, coverage, and plant response.
Seedling Stage: Gentle Light for Delicate Starts
When seeds have just sprouted or cuttings are rooting, their tiny leaves can’t handle strong light. The goal: provide enough energy for root and leaf development without overwhelming the young plant.
Hang your LED grow light 24 to 36 inches above the seedlings. This gives a low PPFD (around 100-200 µmol/m²/s) that supports slow, steady growth. If you have a dimmer, set it to 25-50% power.
Many new growers drop the light too low, thinking “more light = faster growth.” But seedlings stressed by intense light often stall or show twisted leaves.
Once the first true leaves appear and the stem strengthens, lower the light by 2-3 inches every few days. Watch for signs of stress.
Vegetative Stage: Keep Them Short and Bushy
During veg, your plants build stems, leaves, and root mass. You want strong, compact growth, not a spindly plant that will struggle to support flowers later.
The ideal height for most full-spectrum LEDs during veg is 18-24 inches above the canopy. At this distance, the PPFD typically falls between 300 and 500 µmol/m²/s: enough to drive healthy photosynthesis without excess stretch.
If you’re using a dimmable fixture, consider running it at 75-100% power and adjusting height rather than dimming. This gives better light penetration through the canopy. For growers using hydroponic lighting in tents, ensure airflow between the light and the canopy to dissipate heat.
Signs You Need to Adjust the Height
- Stretching: Nodes are far apart, stems thin and weak. Light is too high. Lower by 2-3 inches.
- Leaf curl or yellowing at the top: Light is too low or intense. Raise by 3-4 inches until leaves recover.
- Dark green leaves, bushy growth: Height is just right. Keep steady.
Flowering Stage: Getting the Bud-Boosting Intensity Right
When you switch to 12/12 light cycle (for photoperiod plants) or your autoflowers enter bloom, your plants need maximum light to pack on dense, resinous flowers. But pushing the light too low can cause light stress: buds at the top may bleach or become airy.
For most LED grow lights, the sweet spot during flowering is 12-18 inches above the canopy. This delivers a PPFD of 600-900 µmol/m²/s (or higher for powerful fixtures). Some high-end bar-style LEDs with excellent heat management can sit as close as 6-12 inches, but only if your grow space has strong ventilation and the manufacturer’s guide supports that distance.
The quality of light during flowering directly impacts yield. A light hung too high produces fluffy, loose buds. One too low can cause nutrient burn because the plant’s metabolism spikes while roots can’t keep up with water and nutrient demand.
The “Taco Leaf” Test
If the top fan leaves curl upward like a taco shell, that’s a classic sign of heat or light stress. Raise the light 3-4 inches right away. If leaves droop or turn pale at the tips, raise the fixture. Healthy flowering leaves should be flat, dark green, and spread wide to catch light.
Common Mistakes in Adjusting LED Grow Light Height
Mistake 1: Setting the Light Once and Forgetting It
Your plants grow fast. During veg, they can gain 2-3 inches per day. If you set your light at 24 inches on Monday, by Friday the canopy may be only 12 inches away. Check and adjust every 2-3 days.
Mistake 2: Lowering Too Fast
Plants need time to adapt to increased light intensity. Never drop the light more than 2-3 inches in one adjustment. Give them 48-72 hours to respond before moving again.
Mistake 3: Relying Only on Height, Not on Dimmer
If you have a dimmable LED, lower the light and reduce intensity at the same time. This lets you place the light closer without bleaching. For example, start flower at 18 inches at 75% power, then over 2-3 weeks increase to 100% and drop to 12 inches.
Mistake 4: Ignoring Environmental Changes
When you lower LEDs, canopy temperature may rise slightly. When using lights for hydroponics, monitor leaf temperature, humidity, and air movement too. Good ventilation prevents heat pockets that stress plants even if the light is at a safe height.
How to Measure the Perfect Height for Your Specific Light
Every LED model has a different intensity and beam angle. The best approach: combine the manufacturer’s recommended height chart with your own plant observation.
- Start at the high end of the recommended range for your stage (e.g., 24 inches for veg).
- Wait 2-3 days for your plants to adjust.
- Lower by 2 inches if plants look healthy and aren’t stretching.
- Watch for stress signs every day after lowering.
- Stop lowering when you see the first hint of leaf curl or bleaching, then raise 1-2 inches back up. That’s your optimal height for that stage.
If you have a PAR meter or PPFD meter, even better. Aim for these targets at canopy level:
| Stage | Target PPFD (µmol/m²/s) |
|---|---|
| Seedling | 100-200 |
| Vegetative | 300-500 |
| Flowering | 600-900 (up to 1,100 with CO²) |
FAQ About LED Grow Light Height
Can I use the same height for all plants?
No. Different plants have different light needs. Leafy greens tolerate lower light and can handle closer spacing, while flowering plants like tomatoes or cannabis need higher intensity during bloom. Always adjust to your specific crop.
What if my LED burns plants even at 18 inches?
Use the dimmer if available, or raise the light to 24-30 inches and increase gradually. Some high-end LEDs (e.g., 730W+ fixtures) require 24-36 inches even in flower, especially in small tents without active air cooling.
Should I keep the light at the same height during the entire flowering phase?
Not necessarily. Many growers lower the light gradually over the first 2-3 weeks of flower as buds develop, then maintain that height through bulking. In the final week, some raise the light slightly to mimic the end-of-summer sun and encourage resin production.
Does hydroponic lighting differ from soil in height recommendations?
The light distance recommendations are the same because PPFD needs don’t change. However, hydroponic plants often grow faster, so you’ll need to adjust more frequently. Because hydro runs tend to have higher humidity, check that your light’s driver or diode board has adequate ventilation to prevent moisture damage.
Set the Height Right, Grow a Better Harvest
Getting LED grow light height right is one of the simplest and most impactful skills in indoor gardening. Follow the stage-by-stage guidelines above and tune in to how your plants respond. You can prevent stretch, avoid light burn, and maximize your yield.
Every grow room is slightly different. Start conservative, observe daily, and adjust slowly. Whether you’re setting up your first hydroponic lighting system or fine-tuning an existing one, the right height is the difference between a good grow and a great one.
For more hydroponic growing tips, visit NoSoilGardening.com