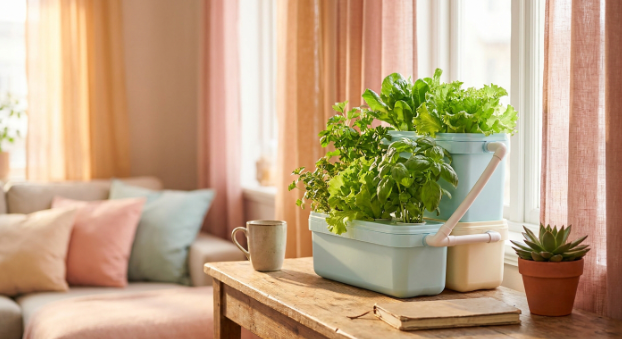
You can build a working hydroponic system in your kitchen or garage with hardware store parts. No soil. No fancy kits. Just water, nutrients, and a plastic tote.
Hydroponics means growing plants in water instead of soil. Nutrients go straight to the roots, so plants grow faster and bigger than they would in dirt.
This walkthrough covers a simple Deep Water Culture (DWC) or basic top-feed system. Total cost: under $50.
What You’ll Build
A fully functional, recirculating hydroponic setup. Perfect for leafy greens like lettuce, spinach, and herbs. Low cost. Easy assembly. Hobbyist-friendly.
What You’ll Need
- Reservoir: 10-gallon plastic storage tote with lid (dark colors prevent algae)
- Submersible water pump: Small aquarium pump, 100-200 GPH
- Tubing: 1/2-inch vinyl tubing
- Net pots: 3-inch plastic mesh baskets
- Growing media: Expanded clay pebbles or coco coir
- Drill: With a hole saw attachment matching your net pot size
- Nutrients: Basic liquid hydroponic fertilizer
Step 1: Source Your Containers and Pump
Your reservoir is just a heavy-duty plastic storage bin. Look for “roughneck” style totes; they’re sturdy and block light. Light hitting your water grows algae instead of lettuce.
For the pump, check the aquarium section at a pet store or search for small fountain pumps online. You need just enough power to lift water from the bottom of the bin to the top of your plants. Budget $15 to $25.
Step 2: Prepare the Reservoir and Grow Tray
The tote lid becomes your plant support. Grab your drill and hole saw.
Space holes 6 to 8 inches apart. Drill slowly. If the plastic feels brittle, run the drill in reverse for a second to start the groove – this prevents cracking.
Test-fit your net pots. They should sit snug without falling through. A little loose? The weight of the clay pebbles holds them down.
Step 3: Assemble the Tubing and Pump
Place your submersible pump at the bottom of the tote. Attach vinyl tubing to the pump’s outlet. Feed the tubing up toward the lid.
For a simple DWC system, you can use an air stone and air pump instead. For a recirculating system, you want that water moving.
Create a basic manifold: poke small holes in the tubing and run it across the underside of the lid so it drips near each net pot. Secure with zip ties. Every plant gets a steady stream of nutrient-rich water straight to its roots.
Step 4: Test for Leaks and Water Flow
Do this before adding plants or nutrients. Fill your reservoir halfway with plain tap water. Plug in the pump.
Watch for two things:
- Flow: Is water reaching every net pot area? If one pot is dry while another floods, adjust your tubing.
- Leaks: Check the edges of the tote. No water should spray from the sides.
Fix loose tubes and pump positioning now. Much easier without plants and fertilizer everywhere.
Step 5: Add Your Plants and Nutrients
Fill your net pots with clay pebbles. Place your seedlings gently in the center. Starting from seeds? Use small rockwool cubes.
Add hydroponic nutrients to the water following the bottle’s instructions. Stick with the “general growth” measurements on the label.
Put the lid on. Turn on the pump. You’re growing hydroponically.
Troubleshooting
- Water getting hot: An overpowered pump heats the water. If it feels like a warm bath, add a small air stone for cooling and oxygen.
- Yellow leaves: Nutrient levels are off, or pH is too high. Use distilled water, or let tap water sit out for 24 hours before adding it.
- Bad smells: Likely root rot. Make sure your pump runs consistently and circulates enough water to keep things fresh.
Quick Summary
Grab a plastic tote, a small aquarium pump, vinyl tubing, and net pots. Drill holes in the lid. Set up the pump to circulate water. Test for leaks. Add plants and nutrients. Fresh produce, indoors, year-round, for under $50.
FAQ
How much does it cost?
A basic 6-plant system runs under $50. The pump and nutrients are the priciest parts.
Do I need grow lights?
A very sunny window works for herbs. For the best results, a cheap LED shop light or a dedicated grow light makes a big difference.
How often do I change the water?
Swap the water and add fresh nutrients every 2 to 3 weeks. This prevents salt buildup and keeps plants healthy.
Check out more info on hydroponics @ my other blog